Navigation
- Part 1 – Prerequisites and creating the virtual machine
- Part 2 – Installing Mac OS
- Part 3 – Configuring Mac OS
- Part 4 – Setting up Xcode
- Part 5 – Building an app to your iOS device
Introduction
If, like me, you’re a Unity or Xamarin hobbyist who develops primarily on a Windows PC but owns an iPhone and/or an iPad, you’ve probably run into the hurdle of requiring an actual Apple-brand Mac computer just to compile and deploy your apps to your mobile device.
This guide will explain how to get around that restriction by using a Windows 10* computer (the « host ») to run Mac OS X and Xcode on a virtual machine (the « guest ») which will allow us to deploy apps to an iOS device without requiring an actual Mac.
Note that the following is against Apple’s Terms of Service so use at your own risk.
* Although I have not tested it myself this should also work on a Linux host
Requirements
- A host computer powerful enough to run a virtual machine (VM)
- At least 8GB RAM (a minimum of 4GB is required for the guest)
- 50GB of drive space to allocate for the guest
- An Intel CPU supporting Intel Virtualization Technology (VT-x). Make sure that this feature is enabled in the BIOS
- VMWare Workstation 15 Player (free for non-commercial use), the virtualization software that will run the VM. Due to Apple’s ToS prohibiting running Mac OS on non-Apple hardware the option to run Mac OS guest is locked out, which is where the next item comes in:
- DrDonk’s Unlocker v3.0, a utility that restores VMWare Workstation Player’s Mac OS guest functionality on non-Apple hardware
- A bootable ISO file of Mac OS 10.13.6 High Sierra to install on the VM. You should be able to find this without too much trouble if you look around
- An iOS device, iPad or iPhone, to deploy your apps to
- A (free) Apple Developer account: just an Apple ID that you activate on the Apple Developer website. The free version will allow you to test your app on your iPhone/iPad.
Limitations of the free Apple Developer account
As of this writing the following limitations apply to an Apple ID that isn’t enrolled in the paid developer program:
- You cannot publish apps to the app store
- You can only have 3 apps on a device at a time
- You can only create 10 bundle identifiers per week
- Apps will stop working on your device after 7 days unless you build/deploy them again
Creating the VM
- Install VMWare Workstation 15 Player. Don’t start it up before the next step.
- Remove the Mac OS hardware restriction with DrDonk’s Unlocker v3.0.
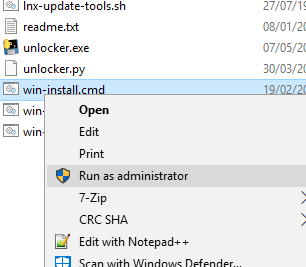
Download it as a zip file from github, extract it to a folder on your host and then run the script win-install.cmd with admin rights (right-click and Run as administrator). The WMWare Player has to be closed for this to work.
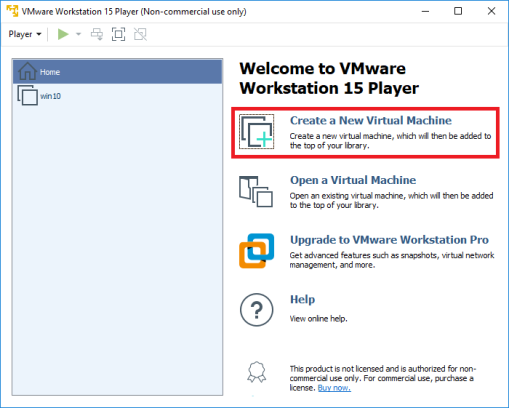
- Start VMWare Workstation 15 Player and Create a new virtual machine.
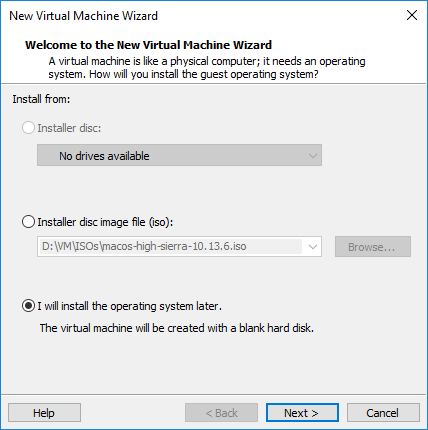
- Select « I will install the operating system later ».
- Select Apple Mac OS X and pick the version that corresponds to the Mac OS ISO you have (here macOS 10.13).
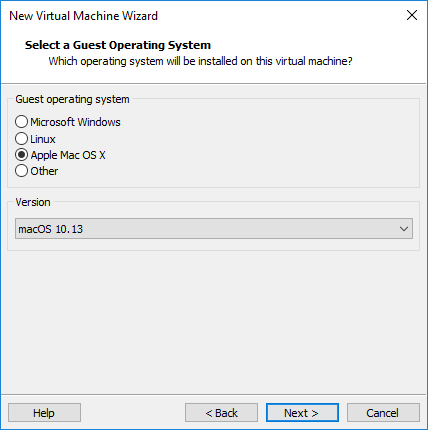
Note: if Apple Mac OS X is missing from that list then something went wrong with the unlocker in step 2. Make sure to follow the instructions contained in the README file included with the unlocker.
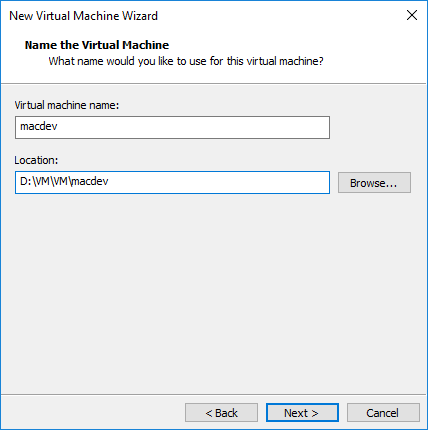
- Name the VM and select a location to put it in.
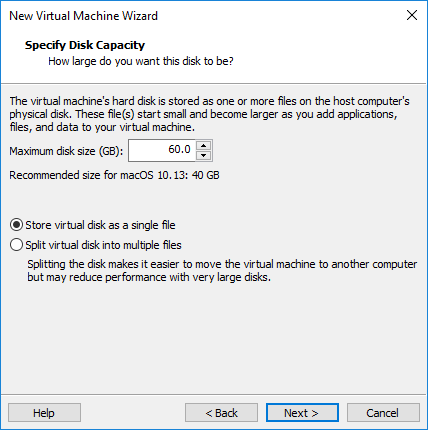
- The suggested maximum disk size (40GB) is a bit low for Xcode but you can change this later. I used 60GB for extra room and left it as a single file.
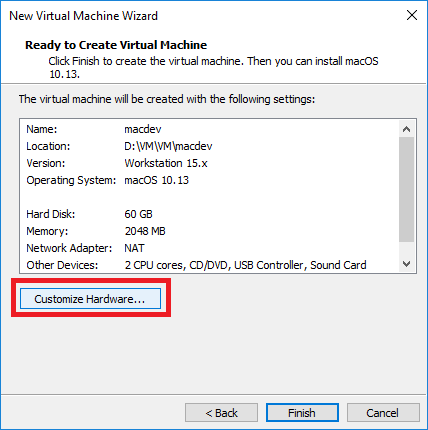
- Click Customize Hardware.
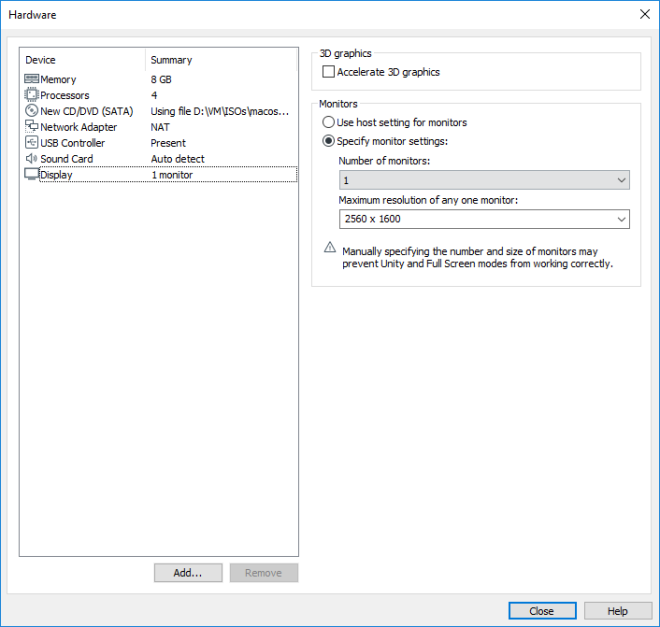
For reference I changed the following setting for my Windows 10 host (Intel i7-7700k CPU, 16GB RAM). If a setting isn’t mentioned here it means I kept the default value.
a. Memory: 8GB. You might not need that much to use the VM but it does make the installation process faster and you can always change it later (min: 4GB)
b. Processors: 4, half the cores I had available on my host
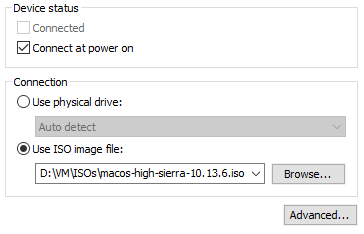
c. New CD/DVD (SATA): select your Mac OS ISO image file here so the VM can boot from it
d. USB Controller: make sure to change USB compatibility to USB 2.0 and check show all USB input devices or the iPhone/iPad will not show up in the VM

e. Display: if you have multiple monitors you may want to change the display settings so the VM only uses 1. The guest add-ons will allow you to resize the window to change the resolution at will. No 3D acceleration because it isn’t supported for Mac OS guests

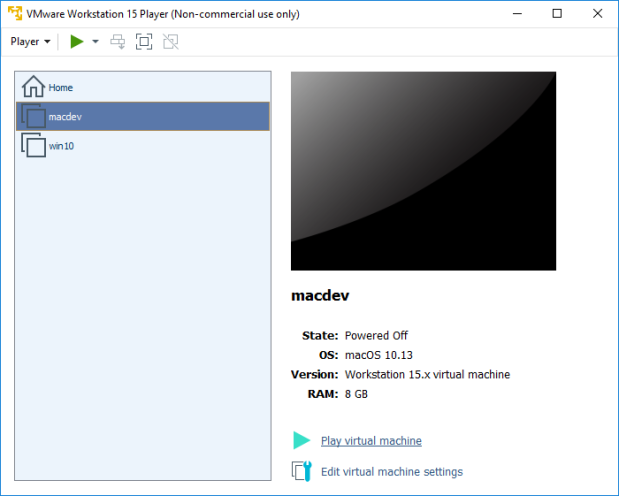
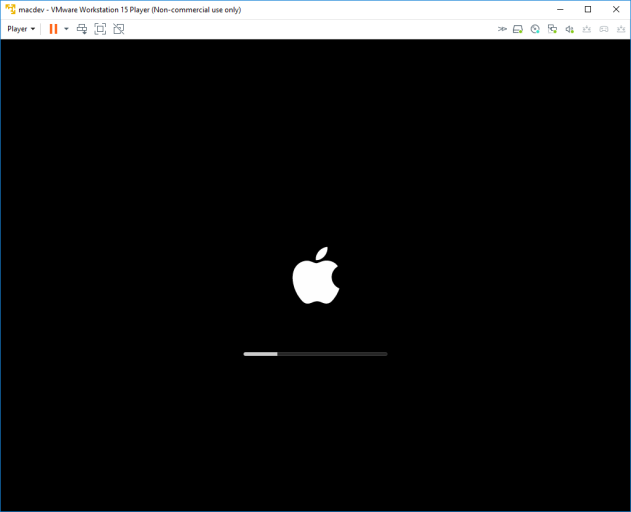
- Now close the Hardware dialog, click Finish and the VM will appear in the Player. Select it and click Play: the VM will boot from the ISO and the installation process should start.
Note: by default clicking inside the VM window will « capture » your mouse cursor. To get it back you can try pressing ALT+CTRL or CTRL+G. Installing the VMWare Tools will allow seamless cursor integration when the guest is running (see part 3).
Continued in Part 2 – Installing Mac OS.
